
Truthfully, I've been doing a pretty awful job at keeping you guys updated with what I'm actually doing, truckwise. The last time I even showed off the interior in all its shanty glory was almost a year ago. In the intervening interval since my last Home Improvement update, I've completed a few fairly large truck projects. By "large", I don't mean anything that requires any real technical competence, but certainly larger than fixing the hole or doing arts and crafts.
Insulation
Hold up, didn't you spend a whole post talking about how you didn't need to insulate the truck? What gives?
Okay okay, you caught me. I know I said it didn't make sense to insulate the truck, because it wouldn't be effective and I can just bundle up when I need to, but curiosity got the better of me after the idea was planted in my head. You might remember that I fixed the hole in the truck after receiving wonderfully detailed instructions by a pseudonymous Nancy (still from PK Safety). Well, as it turns out, Nancy also had some well-formulated ideas on how I could insulate the truck. After a modest amount of research, I decided, "What the hell, let's give it a go," and on nothing more than a whim, I started tearing apart the walls.
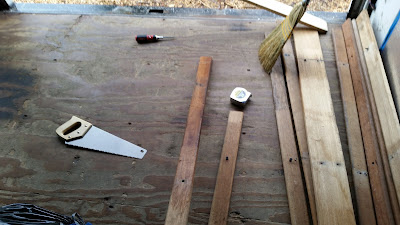
The wood slats I pulled off the walls, and some of the screws I had to coerce out to get the slats off.
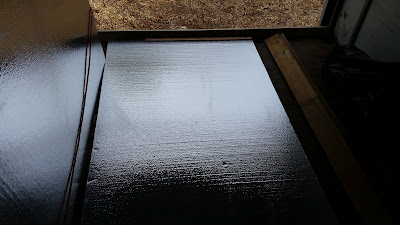
The next step was to line the walls with insulation — Nancy suggested 3/4" rigid EPS foam sheathing. From there, the process is measure, cut, foam seal around the edges, and tape into place. Given that I had to cut about seven 2' x 7' rectangles for each of the two sides, it should have taken a few hours if I was even remotely competent with this type of stuff. But no, instead of a casual few hours of finagling the new fixtures into place, installing insulation became a four month, on-again-off-again affair that kept my truck looking like a war zone for the duration.
How could this have possibly taken you four months?
Naturally, it wasn't four months of constant work, I was only working on it on weekends for the most part, and even then, some weekends I couldn't convince myself I wanted to work on it for more than half an hour or so. The biggest deterrent/problem I encountered was a lack of space. While I have way more than enough (arguably too much) space for simply living and existing, that ceases to be true when I'm trying to cut 4' by 8' sheets of insulation and move around my bed and dresser to access different parts of the wall. So I had to work in sections, e.g. move everything to the back right corner to work on the front left. It basically felt like a giant game of this:

I spent several months playing a life-size version of Unblock Me.
How much space an individual panel takes up when I lay it down to cut it. You'll notice there isn't a ton of room left to maneuver.
Another hysterical complication (which the borderline-prophetic Nancy had warned me about), is that every time you cut into these foam panels with a switchblade, you leave a trail of little styrofoam beads in its wake. So with each and every slice, all ~46 of them, the truck would essentially become a giant snow globe, and even the gentlest of breezes would spin a snowstorm into existence. Not wanting to litter the outside world with these onslaughts of artificial dandruff, I put a plank of wood across the entrance and swept the tiny nuisances away into a trash bag after every few cuts.

What it felt like being in the truck for those four months. I was basically Homeless Snow White™*.
The Final Result
When all was said and done, it didn't look all that bad. I mean sure, it looks like I live in a hobo's spaceship with the shiny tinfoil coating, but at this point we're all painfully aware of how little I care about aesthetics.
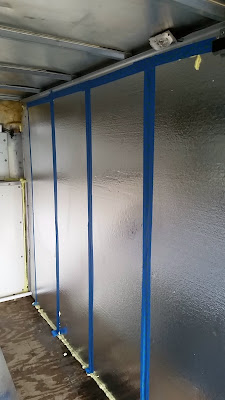
I'm intentionally only showing you the right wall, because I did the left wall first and it looks significantly more shoddy. Also, notice the far more appropriate/less disastrous usage of "Great Stuff" expanding foam this time around.
I haven't actually noticed if the truck retains heat any better (or worse) since adding the insulation, it hasn't been cold (or hot) enough to tell. In any case, it was certainly a learning experience, and a great exercise in what I can do with the truck if I'm feeling particularly bored inspired.
Skylight!
Yeah yeah, I know it's technically called a "sunroof", but this is my home and I'll call it whatever I gosh-darn/damn-well please. Anyway, way back when I first got the truck, I mentioned the possibility of getting a skylight. Cutting gaping holes in the truck is well-outside my truck-modification comfort zone though, so I opted to bring in the professionals over at Happy Vans, who did the wonderful job pictured at the top. I've noticed far better air circulation/ventilation over the past few weeks, and it's nice waking up to a truck-full of sunshine on the weekends. The eventual goal is to cut a door between the cab and the back, so that I can actually lock the rear gate at night instead of keeping it cracked open and "locked" with vice grips. Happy Vans will probably be the ones doing that particular project as well.
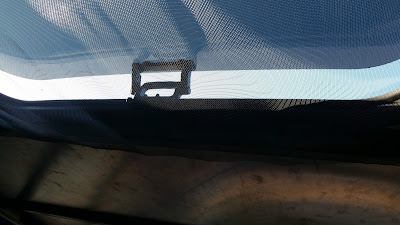
The only modification I made was attaching some metal screen door mesh with a few neodymium magnets, to keep pests out.
Bike Rack (Redux)
This post is already long enough, and I've already spoken on what goes into building a truck-bike-rack, so here's a not-so-pretty picture of the reassembled bike rack:
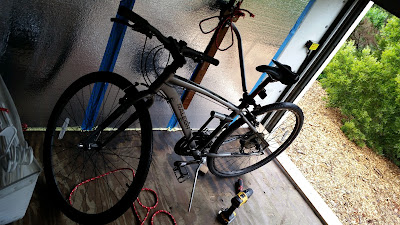
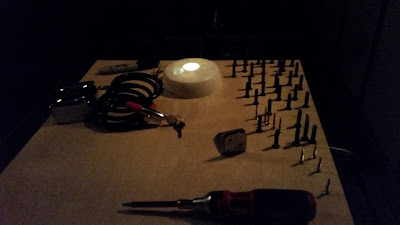
Also pictured: the power drill that I bought after getting tired of driving screws into sheet metal and various other obstinate materials with a screwdriver.
*Or Elsa, if you're more about that Frozen life.